Discover Common Obstacles When Installing Wallpaper Murals
Are you wondering what you can do to change up your home? Do you want to add more texture and pattern to your decor? Well, you can consider using wallpaper murals with an interesting pattern. Installing the mural is a more trouble-free and quick process than painting the entire walls. A wallpaper mural is a perfect option for comprehensive DIY house decoration because it is versatile.
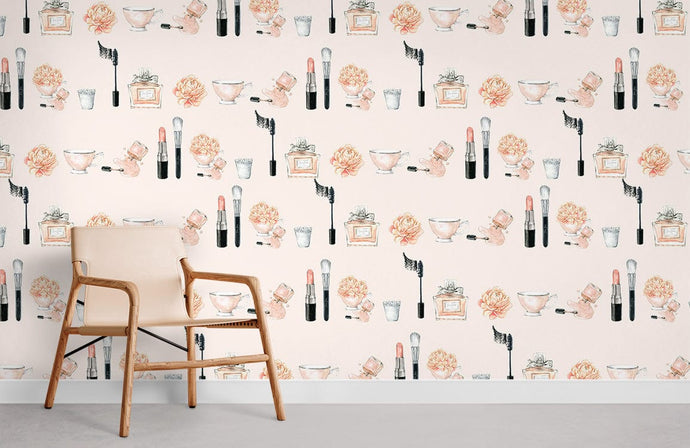
As a thrilling statement wall, wallpaper is packed with many benefits when it comes to changing the look of your home. When it comes to home decoration, you don't want to spend money on painting. There are unlimited designs and photos to select from for your wallpaper. An individual can upload their favourite holiday place to bring home. Wallpaper murals are an ideal choice to install in all areas, such as
- Living rooms
- Dining area
- Bedroom
- Kitchen
- Entryways
- Study room
- Stairs and more
Wallpaper murals can add style to your space, but they can be blemished if it gets damaged or peels at the edges. There are several obstacles you meet while installing the wallpaper mural. But wallpaper outside corners, inside corners, and around edges are common problems.
In this post, you can learn common wallpaper obstacles that you may encounter while installing the murals with their solution.
Three Significant Problems During Installing Wallpaper Murals
When installing the wallpaper mural on the wall, it needs special techniques because it is challenging to apply in and around the corner. Having trouble with murals can occur because it does not account for science. You deal with many issues with adhesive, paper and others.
Wallpaper installation problems might occur from poor surface preparation, hanging error, improper surface and preliminary inspection. If you need to avoid these problems, you should follow the instruction properly. First, let's examine some possible obstacles with the wallpaper mural you intend to apply.
1.Wallpaper Murals Inside Corners
Installing the inside corner of wallpaper is not a simple job, especially for a first-timer. According to the mural type, the house owner suspends the wallpaper length in the inside corner. You will use proper instructions for inner corner wallpapering when using thick or thin wallpaper. If you do not install the wallpaper interior corner correctly, it can peel off and affect the look of the entire wall.

First, you should measure the corner and edge of the last wallpaper mural. Add a slight overlap around two centimetres in width and cut the mural. Cut your next mural according to the measurement and hang the wallpaper. Then, press the paper into corners smoothly with a long ruler and allow different wallpaper to intersect with the next wall.
Trim off the extra paper at the ceiling and attach the next mural. Let it join a one-centimetre extension lead. Ensure the pattern of the mural matches the previous one. The house owner must check all inside corners are straight.
2.Wallpaper Murals Outside Corners
Rooms not only have an inside corner but also have an outside corner at wall ledges. Measure the width of the wall's last length and add a small intersection around two centimetres for thin wallpaper. You can add a joint about five centimetres if you have a think mural. Cut the mural according to the measurement and attach the panel edge-to-edge to the last wallpaper length.

You can put the mural around the outer corner and wrap overlap on the connecting wall. Next, cut off extra murals in the basement and ceiling. When the wall is not straight, it creates wrinkles on the mural that affect its look. A Cutter knife is the best way to apply minor cuts to external corners. After that, add the next mural piece with a joint to create attractive corners.
Again, a person should draw the line for the next wall. Measure the wallpaper width from the top of the outer corner and use a plumb bob to draw the vertical line down. When installing the wallpaper panel, you should check whether the design and pattern of the mural are the same or not.
3.Wallpaper Murals Around Trims
Installing the wallpaper around the edge can be a challenging duty. First, you can attach the mural and let it join the corners. While preparing to wrap the mural around all corners, draw the vertical line on the wall, consider the strip size and add one or two centimetres from the corner to the edge of the wallpaper.

You can split it into two if the distance of the vertical link is more significant from top to bottom of the wall. Allow five centimetres overlapping the mural, make the uncut edge vertical and cut the overlay portion. You can measure different places like the first, corner and last strip. Cut the wallpaper, place the first corner strip and press them into trim edges.
Measure the leftover stripe and draw the vertical line based on the joining wall. Place the second piece of wallpaper and allow the edge to join the previous strip. Use a knife to cut an excess portion of wallpaper and rub away the adhesive, which might have a connection with corners. Install wallpaper around the archway by using the same technique.
Install murals in the area below and above the window if required. Repeat the same procedure to install and trim the wallpaper pieces on all sides of the border around the home. Wrap the mural across the arch corners and smooth out bubbles to look attractive.
Other Wallpaper Mural Installation Obstacles
- Gaps between murals
Sometimes, you install a line of murals on the wall. There is a small gap between the two lines when you look again. It causes due to wrong lying of the wallpaper strip on the wall. Also, it happens if you don't apply an appropriate amount of glue. When small gab displays between mural pieces, it causes poor surface preparation that offers improper adhesion.
If you use too much paste, it causes the mural to slide down. Work slowly to fix this problem and ensure that the mural doesn't get wet and heavy during installation. The mural might continue to expand on the wall's surface, causing wrinkles and bubbles if you do not allow enough time. When you allow enough time, all edges might dry and not peel all edges.
Poor wall surface preparation might cause some wallpaper murals to bond on the wall, resulting in gaps. In addition, if the edges of the mural are struggling during installation, it dries on the surface. As a result, it might return to its standard shape, causing the gap. One of the best techniques to hide the gaps is tinting the sealer, almost similar to the mural ground.
- Bubbles in the wallpaper mural
An air bubble is one of the common wall covering issues. Whether a bubble is small or large, it is challenging to prevent. Sometimes the tiny bubble disappears when the mural dries. Bubbles issue happen because the mural has enlarged after installation, resultant of applying new mural over old one or not having soaked it enough period.
Before sticking to the new wallpaper, you must strip the old paper because the moisture in the glue can cause the existing piece to enlarge. As a result, it causes bubbling that does not offer a better outcome. If you need to fix the air bubbles issues, you can cut the bubble with the blade and apply new glue with the paintbrush.
Pop the stubborn bubbles with the small pin and use a smoothing brush to push out the air of the mural. Again press the wallpaper back into the surface and clean the additional paste to eliminate stains on the paper and wall surface. When the entire mural is poorly affected by air bubbles, you can strip the complete mural and attach its new one to your home. You need to provide enough time to soak the wallpaper.
- Take off borders or edges
The mural border is used at the wall top has a negative tendency to take off. the insufficient wall preparation and low amount of adhesive cause peeling border issues. Ensure new drywall has been sealed prepared before application. In addition, the Wall surface has been cleaned thoroughly to remove grime, dirt and dust, which may keep the mural from sticking.
You can apply the paste to the wallpaper back edges or ensure that the pre-pasted wallpaper obtains wet faster at the corner. In addition, you don't use heavy pressure at the border that causes glue away from the paper. It increases the change of peeling edge, so roll the corner gently on the wallpaper with the help of a roller. You can use excess glue to stop peeling edges.
- Tears during trimming
The wallpaper mural can tear while trimming without hassle. The person could pull against the wallpaper to cut and find the tear. When you use a blade, tears are caused because they don't have enough sharpness. Make sure that the knife is not only sharp but also not overloaded with glue and dried out. Thus, you need to clean the blade after every use.
It is good to follow the manufacturer's instructions before applying the glue. A dull blade can cause tearing during cutting, so it is essential to change the blade often. If the wallpaper tear, you can do only one thing is replacing the wallpaper strip.
- Alignment
First, the mural strip should be in a straight line because misalignment is one of the noticeable problems in the wallpaper. Before hanging the mural, you can mark the vertical line on the wall surface. After that, set the first piece along the wallpaper edge.
Also, use a pencil or carpenter level to mark the straight line that allows you to hang the mural properly. If any wallpaper piece is not hanging in a straight line, you can remove it immediately and start over again. Ensure the first strip of paper is not crooked. Then, match the wallpaper pattern of the next narrow piece beside the measuring line.
- Shading the wallpaper
Shading can differ based on the wallpaper material. The natural material wallpaper is slight variations in colours. When things are desolate, turning round every piece by installing other parts upside down can reduce the shading issue. However, using the non-staining adhesive and the wrong tools during installation causes the shading issue.
When the shading happens with material, it is due to the nap don't run in the same method. Instead, you can brush the snooze against grains on the strip, installed wrongly to offer a uniform and attractive look.
- Curl edges at the seem
The wallpaper edges have curled up at the closure is a common issue. The house owner can fix the issuer quickly. It happens when the adhesive dries faster because of high room temperature. Otherwise, you don't apply enough glue during the handing.
First, you can moisten the particular place with hot water to soften the material. Next, lift corners carefully and slip glue with the toothpick. Now, roll up the wallpaper with the paper roller and clean the excess paste.
Wallpaper stains: Tips to avoid it

It does not matter what home decoration style you have chosen, mural lets you make a grand statement in one step. However, during the installation, people face some problems with the wallpaper. But mural stain is one of the significant issues that affect the result. The mural paste stain can be dangerous while installing the wallpaper on the surface.
If the paste dries, removing it from the wall is challenging. Therefore, you should be careful while applying the paste and sticking the mural. However, it helps you prevent wallpaper stains. The followings are some tips that keep you away from the colours of wallpaper paste.
- Pay attention to excess glue
In some types of wallpaper, the paste is applied to the wall's surface straightforwardly. It means that the paste should not apply thicker that avoid coming into contact with the mural. You can remove the paste dried in seams with a waste cloth or brush.
Push a new wallpaper piece near the previous strip, and some glue will proceed toward this trim. Unfortunately, extra wallpaper glue will drop out on the front when two pieces touch. You can handle this situation by removing the excess paste with the printed mural.
- Wear hand gloves
The mural adhesive can collect in all places, and glue sticks to a person's hands. There is a chance to touch the mural without noticing the paste, which causes some issues. So, you can wear gloves and keep the wallpaper glue-free and clean. The gloves will soak up excess paste immediately.
- Remove stain quickly if murals are wet
It is essential to remove the wallpaper stain faster when they are wet. Carefully dump to soak up extra glue with the lint-free fabric or paper towel. Avoid rubbing on the wallpaper that causes damage. In addition, an individual can use fresh water to remove dried-up wallpaper paste stains. It is hassle-free to detect the new flue stain on the paper in daylight.
Peel and stick is the best wallpaper because you don't want to apply glue while installing. You can peel the back paper of wallpaper and hang them wherever you need it. It helps you save time and effort when decorating the home interior.
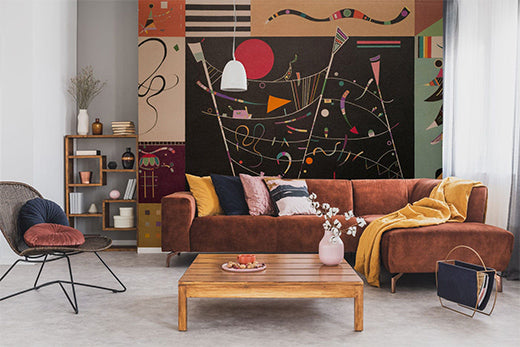
Pros of using wallpaper mural
The wallpaper mural decorative technique has gained more popularity in the modern era. The entrance is the space that offers the complete impression of the house. Everyone see the entryway first before they see the rest of the home. So, it is essential to create the entrance stylish and attractive. Wallpaper murals are the best technique to make a WOW moment in your residential place.
Installing the mural is a simple process compared to painting the wall, making it popular for the DIY home decoration project. You can replace the mural anytime you wish and hang the new wallpaper with a trendy pattern. When using wallpaper, you can stay away from the paint smell. However, it is easy to clean the wallpaper with wipes or vacuuming.
Wallpaper murals are available in numerous patterns, designs, colours and styles. Thus, you need to purchase the best wallpaper which meets your taste and decoration theme. Furthermore, the mural can last for a more extended period, which means it offers a higher return on investment. Therefore, it is a budget-friendly way to makeover the home look.
Conclusion
We hope this post will help you to fix problems while installing murals. There is a no better option to decorate the home than wallpaper murals. Regardless of your décor theme, if you can add anything bold floral, stripy mural or bright tone. It offers a beautiful and fantastic look to your space, whether a living room wallpaper or bedroom wallpaper mural.
Installing the peel and stick mural is simple, making it popular for DIY home decoration. When it comes to mural patterns trends, there are endless opportunities. Therefore, you can select exclusive mural designs which suit your wall and floor colour and décor theme. Dress up your plain and boring wall with floral pattern wallpaper mural to transform its look!